Set up and use iCloud for Windows
With iCloud for Windows, the photos, documents, and bookmarks on your PC are updated automatically on your Apple devices.
What you'll need
Before you download iCloud for Windows, you need to set up iCloud on all of your Apple devices. You can sign in to iCloud with your Apple ID. Just follow the set up instructions for your iPhone, iPad, or iPod touch with iOS 5 or later or Mac with OS X Lion 10.7.4 or later.
Depending on what information you want to keep up to date in iCloud, you might need a few other things:
- Mail, Contacts, Calendars, and Reminders: Outlook 2007 through Outlook 2016.
- Bookmarks: Safari 5.1.7 or later, Internet Explorer 10 or later, Firefox 22 or later, or Google Chrome 28 or later.
- Documents: iCloud Drive set up on each of your devices. If you want to add the files from your Mac Desktop and Documents folder to iCloud Drive, update your Mac to the latest macOS then turn on Desktop and Documents.

Set up iCloud for Windows
- Download iCloud for Windows. If it doesn't install automatically, go to File Explorer and open iCloud Setup.
- Restart your computer.
- Make sure iCloud for Windows is open. If it doesn't open automatically, go to Start, open Apps or Programs, and open iCloud for Windows.
- Enter your Apple ID to sign in to iCloud.
- Choose the features and content that you want to keep up to date across your devices.
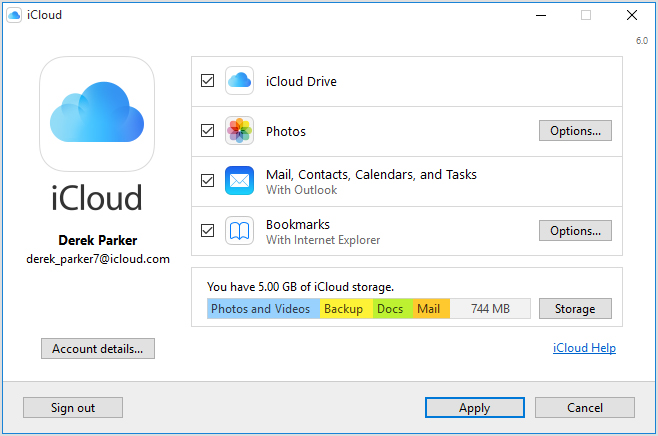
- Click Apply.
Download your photos and share with friends
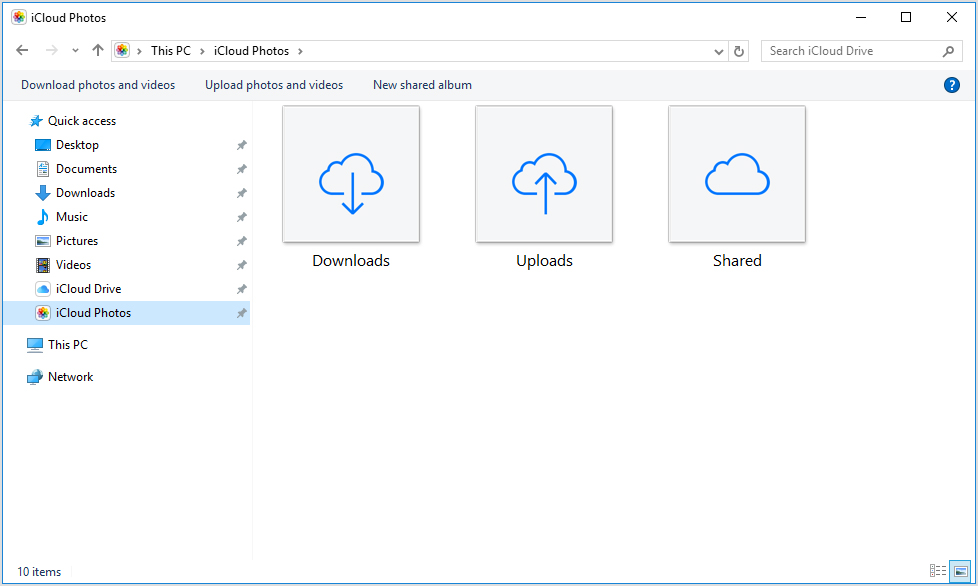
When you turn on Photos, iCloud for Windows creates a Photos folder in File Explorer called iCloud Photos. iCloud Photos uploads new photos and videos that you add to the iCloud Photos Uploads folder on your PC so you can view them in the Photos app on your iPhone, iPad, iPod touch, and Mac, and on iCloud.com. New photos and videos you take automatically download from iCloud Photos and you can choose to download your entire collection by year. And Shared Albums lets you view, share, and comment on the photos and videos you share with other people.
You can also use these steps to find your photos on your PC:
- Windows 10: From the Start menu, scroll down and open the iCloud folder. Select iCloud Photos.
- Windows 8.1: From the Start screen, click the down arrow in the bottom-left corner, then click the iCloud Photos app.
- Windows 8: From the Start screen, select iCloud Photos.
- Windows 7: Click the Windows Start button, then click Pictures. Click iCloud Photos or Photo Stream under the Favorites menu in the panel on the left. Double-click My Photo Stream to view your photos. This also shows up as a folder in the window that appears.
See your files with iCloud Drive
When you turn on iCloud Drive, iCloud for Windows creates an iCloud Drive folder in File Explorer. Any documents that you've stored in iCloud will automatically download to the iCloud Drive folder in File Explorer. Files that you create on your PC and save to this folder automatically appear on your other devices.
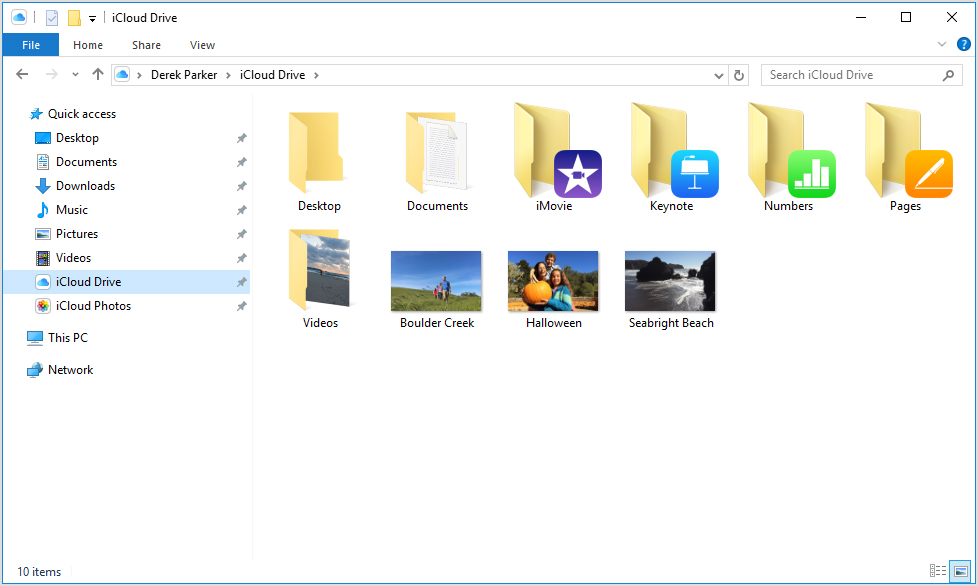
You can also access your iCloud Drive files at iCloud.com.
Keep your mail, contacts, calendars, and reminders up to date on all of your devices
Make sure that you set up iCloud Mail on all of your devices:
- On your PC, open iCloud for Windows, select Mail, Contacts, Calendars, and Tasks, then click Apply. You'll see your iCloud Mail account in the folder pane on the left side of Microsoft Outlook 2007 through Outlook 2016.
- On your iPhone, iPad, or iPod touch, tap Settings > [your name] > iCloud and turn on Mail. If you're using iOS 10.2 or earlier, tap Settings > iCloud.
- On your Mac, choose Apple menu () > System Preferences, click iCloud, then select Mail.
Manage your iCloud storage and account information
You can manage your iCloud storage by upgrading your storage plan or reducing the amount of storage that you're using. If you want to make changes to your Apple ID, you can update your email, mailing address, or other account information.
- To see your available storage, open iCloud for Windows.
- To manage your storage, click Storage. Select an app to see how much storage you're using, or click Buy More Storage to upgrade.
- To manage your Apple ID, open iCloud for Windows and click Account details. Click Manage Apple ID.
Update your version of iCloud for Windows
To check for updates, open Apple Software Update on your PC. To get notified when an update is available through Apple Software Update, choose Edit > Preferences, and select when you'd like to check for updates. You can choose Daily, Weekly, Monthly, or Never.
Sign out of iCloud on your PC before you upgrade and install iCloud for Windows.
Turn off or uninstall iCloud for Windows
If you turn off a service in iCloud for Windows, your information won't automatically stay up to date in iCloud, and you won't see updates made on your other devices. Follow these steps to turn off a service or iCloud:
- To turn off a service on your PC, Open iCloud for Windows, then select or deselect that service. To save your changes, click Apply.
- To turn off iCloud for Windows, open iCloud for Windows, then sign out.
If you want to uninstall iCloud for Windows, remember to make a copy of your iCloud data and save it on your PC. Then sign out of iCloud for Windows on your PC, and follow these steps:
Windows 8 or later:
- Go to the Start screen, right-click in the bottom-left corner or click, then select Control Panel.
- Click Uninstall a Program.
- Click iCloud > Uninstall.
- When asked to confirm, select Yes.
Windows 7:
- Choose Start menu > Control Panel.
- Click Programs > Program and Features.
- Select iCloud > Uninstall.
- Click OK to continue.
Information about products not manufactured by Apple, or independent websites not controlled or tested by Apple, is provided without recommendation or endorsement. Apple assumes no responsibility with regard to the selection, performance, or use of third-party websites or products. Apple makes no representations regarding third-party website accuracy or reliability. Risks are inherent in the use of the Internet. Contact the vendor for additional information. Other company and product names may be trademarks of their respective owners.